Showing posts with label Photoshop. Show all posts
Showing posts with label Photoshop. Show all posts
Saturday, January 12, 2013
Adobe giving away free copies of CS2 series
Ok, here is the CS2 downloads page, and here is a link to a large thread about in CGTalk.

Saturday, December 3, 2011
Sunday, January 23, 2011

Friday, December 17, 2010
Free PSD graphics

psdGraphics.com is a nice resource site for free PSD graphics templates.Also some Photoshop tutorials listed out there.
Wednesday, June 3, 2009
Wiring and Ink tricks
Wire Render
An easy way to make wire render is to apply "Edit Poly" modifier to your object and in Edge subObject level select all (Ctrl+A) edges, and press "Create Shape" button. Finnaly select created shape and set wirecolor to black, turn on "Enable In Renderer" and play with Thickness size.
The cool here is:
Ink style
There is some 2D trick for Ink style using any kind of 2d graphic editor like Photoshop who can convert bitmaps to GIF file format. All what you need to do is to disable Dither (0%) and reduce colurs. See pictures below.
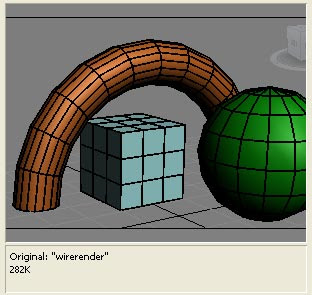
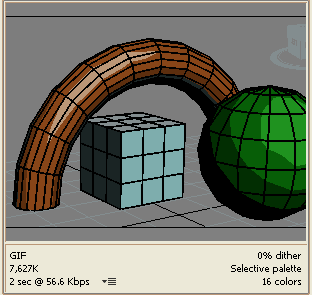
Of course for better result render diffuse and wire in separate passes.
An easy way to make wire render is to apply "Edit Poly" modifier to your object and in Edge subObject level select all (Ctrl+A) edges, and press "Create Shape" button. Finnaly select created shape and set wirecolor to black, turn on "Enable In Renderer" and play with Thickness size.
The cool here is:
- - you have full control over outline size
- - better antialiasing
- - fast rendering time
- - you can delete unwanted edges
Ink style
There is some 2D trick for Ink style using any kind of 2d graphic editor like Photoshop who can convert bitmaps to GIF file format. All what you need to do is to disable Dither (0%) and reduce colurs. See pictures below.


Of course for better result render diffuse and wire in separate passes.
Thursday, February 26, 2009
Make your own HDR image
Let me mention the reason that provoked me to write something about custom made HDR image.
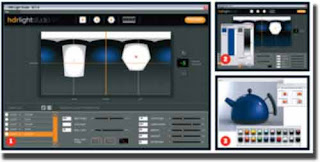 Popping up a new program - "HDR Light Studio", a software designed for the creation of custom HDR lighting images. A trial version (useless) is available for download. This niche market is not yet filled, This explains the speculative high price (£499!). I personally do not see anything special in this program, nor pro. Sorry for my low estimate, but you can judge for yourself the capabilities of the program as view video clips on its official website. After the time when a large choice of HDR's software available, programs like this will be completely free.
Currently we can edit HDR images in Photoshop or merge our own cg-photos.
Else if we needed a cg-made HDR enveronment, well, 3ds Max is the opposite.
1. What to do in Photoshop:
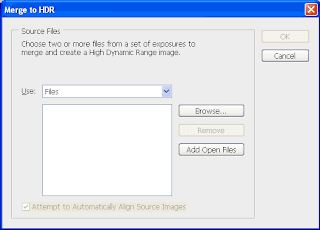
In the menu choose "File > Automate > Merge to HDR..." and in an dialog browse to select your photos.
 2. What to do in 3D Studio Max:
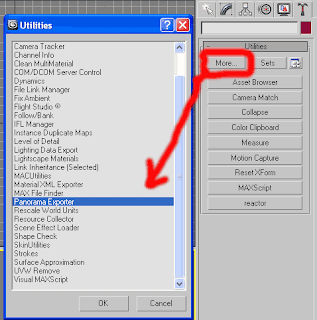
First to say if we are modeling our environment, in practice we don't need any HDR maps. Else what if we don't have suitable map for our scene? The necessary environment can be on the other end of the world or even non-existent, right? It is best to make your own cg-map then. Built-in utility is available for this purpose in 3ds Max - "Panorama Exporter". You can open it from the menu "Rendering > Panorama Exporter..." or from Max Utilities panel press "More..." button and double click over "Panorama Exporter" in dialog listbox.
 Let me give an example. I follow the great Pete Draper's tutorial of the "starfield" to make good-looking stellar field and export it to HDR.
 You can download:
* Note about my example:
 Popping up a new program - "HDR Light Studio", a software designed for the creation of custom HDR lighting images. A trial version (useless) is available for download. This niche market is not yet filled, This explains the speculative high price (£499!). I personally do not see anything special in this program, nor pro. Sorry for my low estimate, but you can judge for yourself the capabilities of the program as view video clips on its official website. After the time when a large choice of HDR's software available, programs like this will be completely free.
Currently we can edit HDR images in Photoshop or merge our own cg-photos.
Else if we needed a cg-made HDR enveronment, well, 3ds Max is the opposite.
1. What to do in Photoshop:
In the menu choose "File > Automate > Merge to HDR..." and in an dialog browse to select your photos.
 2. What to do in 3D Studio Max:
First to say if we are modeling our environment, in practice we don't need any HDR maps. Else what if we don't have suitable map for our scene? The necessary environment can be on the other end of the world or even non-existent, right? It is best to make your own cg-map then. Built-in utility is available for this purpose in 3ds Max - "Panorama Exporter". You can open it from the menu "Rendering > Panorama Exporter..." or from Max Utilities panel press "More..." button and double click over "Panorama Exporter" in dialog listbox.
 Let me give an example. I follow the great Pete Draper's tutorial of the "starfield" to make good-looking stellar field and export it to HDR.
 You can download:
-- my sample CG HDR map of the starfield here (spherical environment, w/h:3072*1536, 6.3 MB),
-- also and my finished Max material here (*.MAT file, 48 KB).
Naturally, we can render to HDR every object in the scene - terrain, landscape, buildings, interiors, etc. My current example is prepared for the Space stage, If this confuses you. Right now I have no particular model prepared for the purpose. Even I think, would be nice to add a few comments on this example.
Here's video preview of the stellar field:
* Note about HDR:
HDR is a static image format, so when we plan our scene, we must have in mind to render only static objects. We must to hide all animated objects and effects, including animated lights, during the rendering process of our HDR.
* Note about my example:
If you have noticed, the stars in the video flashing. After the background is static, how they blink? I rendered the video with default Max scanline renderer (MSR), and in particular its shortcomings lies the answer :) In very small objects, already at a size 1 pixel or less, MSR occurs given pixel in a color close to the neighboring, and thus receive nuances in each frame. this is one of the many shortcomings of MSR, but in this case it becomes a high priority. Imagine how much work we wait if you have to thousands of twinkling stars animated. That is, as I said, this starfield I prepared for another purpose. Might already guess for what :) ... to use it for video background.But this is another topic :D
Monday, January 19, 2009
Normal Maps by Edi
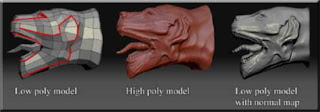
Normal maps - baking, creating & correcting
by Edi_W, 2007-09-17
Used software:
by Edi_W, 2007-09-17

Very informative and detailed explanation Normal map tutorial. This tutorial will be beneficial rather games developers. It try to explain some techniques and show you how to bake and create normal maps.
Used software:
- ZBrush 2 - for baking normal maps from high poly models.
- 3D Studio Max - for modeling low poly models and UVW mapping.
- Photoshop CS2 - for creating normal maps and editing baked maps.
Tutorial is avaliable in ZIPed PDF files in 3 languages:
Subscribe to:
Posts (Atom)

 Posts
Posts


