Pages

Tuesday, March 31, 2009

Modeling a Basketball

by Christa on Jan.13, 2008

This tutorial will show you how to model a highly detailed basketball in 3D Studio Max using box modeling techniques. This tutorial is suitable for beginners but assume some basic knowledge.

Saturday, March 28, 2009

Growing Babylon


MAXSript tutorial for beginners

Content (What we do):
[*] Starting with some simple boxes creation
[*] Adding a simple parametric animation (grow height)
[*] Testing and debugging
[*] optimizing the code
[*] check for technical trouble
[*] Adding ProBoolean to collapse all boxes to EditablePoly
(to reduce the number of polygons and objects)
[*] Adding MaxVersion() check (need for ProBoolean)

So here is the idea...
to make step pyramid from box primitive and animate it.

Note: This is not exactly "How To" tutorial, rather "walk-through" scripting procces, which will meet the most basic things in MAXScript.


Download Link (PDF and final MS script)

Tuesday, March 24, 2009

How to modeling Step Pyramid using Straight Stair


In this totorial I use "Straight Stair" primitive as a basis to build step pyramid, also show the usefulness of MacroRecorder.
Download link: PDF (212kb)

Enjoy!

Monday, March 23, 2009

3dhuntsville.com tutorials


Thursday, March 19, 2009

Reverse Time


What to say... title and screenshot said everything.
An example of global Max "reversetime" operator.

Monday, March 16, 2009

makeIFL

I wrote this sample script by ScriptSpot.com user request.
This mini tool create *.ifl of a sequence bitmaps that already exists.


Why needed? 3ds Max automatically creates IFL if checked in the renderers settings, but there are cases when it is not possible, for example, when using pre-render script. An good example for pre-render script is "Sort Render Elements" by Tollef Roe Steen.
Usage:
  1. Select bitmap file type filter [*]
  2. Select directory with bitmaps
  3. Press "Save IFL" (to create IFL in the same folder)


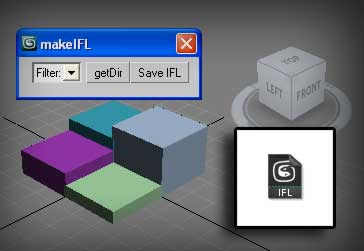
[*] Filter needed if for some reason the folder contains other file formats, thumbnail for example. Note - if filter not selected or if bitmap type not identical with the existing images, script will create empty IFL file.

Download URL (1)
Download URL (2)
ScriptSpot review

Saturday, March 14, 2009

random City

There is something trivial but useful from me.
Try this MaxScript and have fun :)

Download Link -- randomSity.ms

Tuesday, March 10, 2009

knotty Line v.0.3

Here's an amusing mini tool (MaxScript) from me - "knotty Line"(v.0.3).

Actually I was looking for a spline tool for making rope for my personal simulations with Reactor, but nowhere can find something similar, so I make my own.

Of course, anyone can use my script for many other tasks. I'll not try to describe everything that could be done with this mini tool, not directly, of course, but as an auxiliary method in spline modeling process. This is a matter of imagination... but to acquire some idea, I would strike a quick example "How to make a ladder":

  1. Create one line with default setings
  2. Change X start position to 5 and hit and create another one.
  3. Select first shape, press "Attach" and hit second shape.
  4. Use "Cross Selection" and click once over one spline then over another one, and right click to exit cross selection tool.
  5. Now Del upper and lower horizontal segments.
  6. Check "Enable In Renderer" (and if you wish - "Enable In Viewport") and hit F9 (render).

You can download knotty Line here
ScriptSpot topic (here)

Monday, March 9, 2009

Modeling Mail-paper in 1 min.

Yep, it's a funy job for one minute. Of course we can make a flatten box or plane and just assign material with bump texture, but the final render result will become with much worse antialiasing. So try this...

[*] NOTE: Click on pictures to view them in large size.

1. Turn on 2D Snaps Toggle and drow in the Front viewport a Plane.
2. Change segments of Lenght and Width to 2.
3. Right and select "Convert To: Editable Poly".
4. In Back viewport select Border and press Cap (no more open edges).
5. In Vertex mod select centers vertex and press the box right to the Chamfer button and in it's dialog box change Amount and press OK.
6. Now select vertex as in the picture and press Connect.
7. Select unneeded edges as in the picture and press Remove (Not "DEL" button!).
8. Remove unneeded vertex and select and Move (W) center vertex a little but up in Y direction.
9. In Polygon mod select this 2 triangles and Extrude a less.
10. Repeat Extrude action but this time only for upper triangle.

That's all. Change object wirecolor to White and Render.

There is render result without material assigned :)

Asteroid Belt With PFlow

by Didik Wijaya


In this tutorial you will learn how to create nice space scene. There are several objects you need to create: simple planet, asteroid belt, and then making all asteroid moving in circle. Also you will create a starry background. This scene is created from scratch.

Getting Started With Particle Flow

by Didik Wijaya

This tutorial needs you to understand basic use of 3dsmax Particle Flow.

Thursday, March 5, 2009

Physically-based Renderers


AIR
Arnold
Brazil
finalRender
fryrender
Indigo Renderer [*]
LuxRender [*]
Maxwell Render
Mental Ray
Radiance
RayMax
RenderPal
Virtualight
V-Ray
YafRay

[*] NOTE:
Only Indigo Renderer and LuxRender here are freeware software.

Anchor Box Modelling tutorial

Creating a Comet with Particle Flow

A very nice looking comet coming your way

Fine explanation with many screenshots.
< Just read it here >

Simple Utility

It's a easy job to make scripted utility in Max.

utility UName "UTitle" ()

But it's empty right now. Lets make some box with it. If we open MaxScript Listener (F11) end type box() and execute (hit Enter), Max will create a box in position [0,0,0] with size [25,25,25]. To have access to box properties we need a variable like this: b=box() . But if we put this simple line directly into our utility, will appear only error. This will work on exit:

utility makeBox "Make Box"
(
-- then close utility
on makeBox close do
(
b = box()
)
) -- ie need action to create a box

Lets make a button to create a box:


utility makeBox "Make Box"
(
local b
button myBtn "Create"
on myBtn pressed do
(
b = box width:20 length:20 height:20
)
)

This code make the same thing but now have button "Create" and some parameters assigned to the box, so this one more like an utility :) and may say you done your first scripted utility, and it makes somthing :)


There is one example. Some materials not support open faces and if you use plane primitive will run out strange render result. For that case you could cap the hole on the plane or make a box with zero height. And if you often use square plane, why need to set every time all three dimensions? Then lets speed up our work with one simple utility who will make flatten box for us by entering only one params:


utility FlatBox "FlatBox"
(
local b

group "Parameters"
(
spinner dim "Face Size" range:[10,10000,100] \
type:#integer fieldwidth:30 across:2 align:#left
button fbox "Create" align:#right
)

on fbox pressed do
(
b=box()
b.width = dim.value
b.length = b.width
b.height = 0
b.name = uniquename "FlatBox"
)

group "About"
(
label lab1 "FlatBox Creator"
label lab2 "Test version 0.1"
label lab3 "by 3DMyths(c)2009"
hyperLink website "(my web site)" \
address:"http://3dmyths.blogspot.com/" align:#center
)
)


Figure 1 show utility panel and result (Figure 2) in Modify panel.
You can download script here (570 bytes).

Tuesday, March 3, 2009

How to build and destroy a procedural Wall

Concevied and realized by Augusto Lombardi

This tutorial we will create and destroy a procedural wall in 3dsMAX using Standard Geometries, SpaceWarps and ParticleFlow without scripting tecniques. We will also use the plug-in ParicleActionsPlus [*] wich gives a good control on particles positioning, you can free download it at this link. Lastly we will use collisions to make fly the bricks of the wall. This tutorial will take more or less 45 minutes for an intermediate level of difficulty.
[*] ParticleActionsPlus extend standart PFlow with new operator "Position Object+" and this tutorial is based on this feature. Cool, but Augusto Lombardi forget to noticed that so this plug-in is for 3ds max 8.x and... I hope it's work in above 3ds max versions.

Monday, March 2, 2009

3 Reactor tutorials

by Andrzej Gasior

Short description: how to make...

  1. Coins using only "Ridig Body Collection".
  2. Curtain using "Deforming Mesh Collection" and "Cloth Collection".
  3. Lift using "Ridig Body Collection", "Point-Point Constraint", "Rope Collection" and "Motor".
[ Read them here ]
Download complete .MAX files:
[ 1. Coins ] [ 2. Curtain ] [ 3. Lift ]

This tutorial should be among the most popular when comes first in Google when searching for "reactor tutorial". What I wonder is, why no comments or questions after three tutorials have errors.

One of the rules for a correct simulation in Reactor is the objects do not contact each other, otherwise would intersect. I am new in Reactor but even I see that Coins in the first one intersect among themselves, and the reason for this is clear to me, for the other two did not, especially for third. There can be seen that while reel rotating in one direction and the rope is wound in the opposite direction, and that not touching the rope pulley. But here is no longer clear for me.

I'll be happy if someone help me out with ideas or advice.
Thanks in advance to everyone who help me to see the error here!

Sunday, March 1, 2009

Create a wrecking bal


INTRODUCTION

In this tutorial you will use 3D Studio Max 6 and reactor to set up a physics simulation. Using these animation tools you will create a wrecking ball (swinging chain with heavy ball on the end used to break things, see figure 1). This tutorial will touch on some of the key elements to remember when using reactor. After completing this tutorial you will be able to create chains and hopefully you will avoid common mistakes that often frustrate people when using these techniques. This tutorial will give you the knowledge to explore and experiment with most of the reactor tools. If used properly, reactor is a powerful tool.

WARNING! THIS TUTORIAL ASSUMES YOU KNOW THE INTERFACE AND WORKINGS OF 3D STUDIO MAX 6. THIS TUTORIAL IS FOR EXPERIANCED 3D ANIMATORS.

3ds Max shortcuts


Selected keyboard shortcuts to help you get the most from 3ds max. The application contains many more key combinations than can be listed here. For a full run-down, consult your user documentation.