Wednesday, April 29, 2009
Bounding Box to Box

Tuesday, April 28, 2009
Material morphing
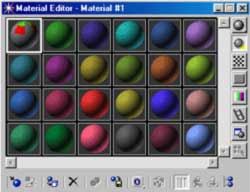
This tutorial has nothing to do with morpher modifier or morpher material. Instead, it attempts to show how a material can be changed or animated over a period of time using the powerful features of the volume select modifier. This method is very useful (or already been used intensively) in the CG/Animation industry. We shall do a simple tutorial to illustrate the idea: the spread of a red dot over a plane.
Monday, April 27, 2009
Saturday, April 25, 2009
Saturday, April 18, 2009
Thursday, April 16, 2009
Pull Down it!
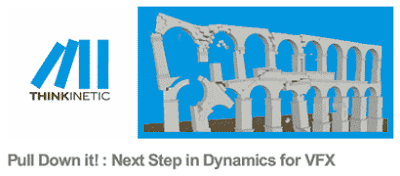
Thinkinetic (an AutoDesk authorized developer) announce the release of Pdi! 1.0, as a plugin for Autodesk Max and Maya. You can download it for free in the download link of the site.
Pull down it! is a brand new dynamics solver which allows for the creation of fractures as well as massive rigid bodies simulations. By using its technology digital artists are able to simulate fast and easily scenes made of thousands of objects and collapse buildings, bridges or any kind of brittle material.
Fast, accurate rigid bodies solver
The rbd solver inside Pull down it! is the result of several years of research in dynamics for VFX. It has no limits in the number of objects in simulation and is able to compute hundreds of contacts in seconds. It overcomes all the typical problems with other solvers, It is not necessary a gap between objects anymore, Pdi! technology computes plausible motion in almost any case, in addition it is mathematically probed to conserve energy and it computes physically correct friction(PCF); all these issues together guarantee stable, accurate simulations, not objects flying away anymore!
Fracture capabilities
The technology of fracture inside Pdi! is absolutely new and groundbreaking. It allows breaking apart any kind of brittle material as stone, glass or stucco. By using it digital artist are able to simulate the collapse of buildings and bridges in minutes. Not the least its easy setup and powerful stress tools allow for control in the creation of cracks and drive the simulation to the desired end.
Animation friendly
Pdi! is integrated in the most popular 3D packages, It catches the geometry from the viewports and computes the final result as animation keys, It allows to reset the simulation and start again as many as needed also tweaking parameters and resume simulation at any frame, in addition animated objects and characters are able to interact with the simulated ones.
The standard version of Pdi! 1.0 is free and tutorials to geting started available online in the official web site.
Wednesday, April 15, 2009
100 Xfrog content for free
 100 Xfrog/Greenworks quality trees and plants available for free downloads from Autodesk Seek. Here's the announcement.
Monday, April 13, 2009
MaxScript license-protection
Particle Flow drops
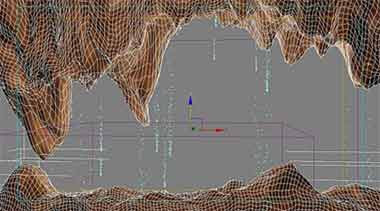 A tutorial by Alessandro Cangelosi on using Particle Flow for generating drops of water falling from a specified object.
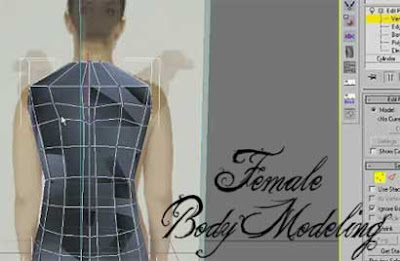
Female Body Modeling
Saturday, April 11, 2009
Light Noise Animation
aStr = animationrange.start
aEnd = animationrange.end
step = random 1 3
for t = aStr-1 to aEnd by step do
(
sliderTime = t
set animate on
$.multiplier = random -1 1
set animate off
)
Yep, that's all. first 3 lines declared needed variables. Using random for step and for multiplier. Try this script and have fun.
Friday, April 10, 2009
Making of Snow

Thursday, April 9, 2009
Animation Tips & Tricks

Ozone 4.0 free open beta

Hotfix for Max 2010 released
 Autodesk have released a hotfix for Max 2010 and Max Design 2010 which addresses the following issues:
- Performance regression under certain conditions when using mental ray with Final Gather bounces
- Stability issues when using an instanced Cloth modifier
- Stability issues occuring during file load with instanced geometry and Hardware Shading enabled
Tuesday, April 7, 2009
Reactor or Dynamics?
for comparative analysis between the Reactor and old built-in Dynamics utility.
Dynamics simulation return mostly correct result then Reactor,
especially if you work with a few objects, but require more time to setup
and require enormous amount of time for calculations. Score at least worth.
Reactor has a simple settings for easy setup but the final result is
physics inaccurate. As you can see on the video, after coins hit ground
they freeze slightly above in the air in random rotation position.
Sad conclusion, at least for me, is that the Reactor does not solve
our problems when we need a realistic simulation.
Smashing wall with reactor

Another nonsense!
Smashing ball has animated in frame 0 where is start position and frame 2 where is moving closer to the brick-built wall but ... if it is a "unyielding" then will stop there in frame 2 and nothing more happens. So I assume, the author of this tutorial was add one more animation key to move the ball inside the "building" but ... inadvertently forgot to write about.
And that's not all ... he/she said to add all planks and bricks to Fracture. Heh,... this way reactor would return bullshit result. Judging by the writing: "You noticed that all bricks moved, we must erase that frames.", well, there no Fracture on this simulation, only Rigid Body Collection.
I keep wondering why someone publish such "tutorials"!?
Sunday, April 5, 2009
Saturday, April 4, 2009
Animated flag with reactor
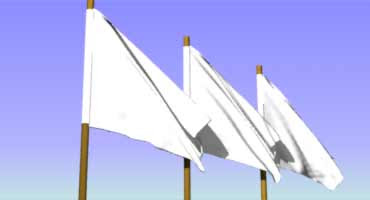 There is two ways to make flag simulation in 3ds Max, with Cloth modifier or with reactorCloth modifier. For the first metod I found this tutorial but following it step by step gives wrong result. I do not know where is the problem but if you want try this method. Second one is by reactor and it's quite easy:
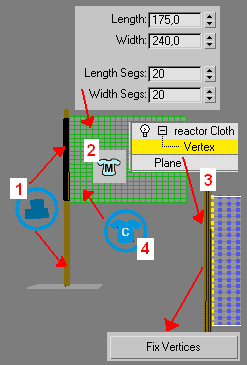
[*] Make a Plane for the flag
[*] Make spline Line and enable it in renderer
[*] Make onother Line with height as the Plane
and increase it thickness a little more than the fist line
[*] Create Rigid Body Collection and add this 2 lines to it
(keep their mass to zero)
[*] Apply reactorCloth to the Plane
and in modifier subobject level Vertex
select vertices to the holder side (as in the picture)
and press "Fix Vertices" (it's important step)
[*] In Properties for the Plane set mass to 1
[*] Create Cloth Collection and add the Plane to it
[*] Create Wind (and play this the settings)
[*] Now you are ready for simulation (Utilities > reactor)
[-] Optional for more realistic look you could apply
Shell and TurboSmooth modifier to the cloth.
Friday, April 3, 2009
Switch cycle using Material modefier
In this tutorial I will show you how to make switch cycle (on/off) using Material modefier. Of course, you can use any object for the purpose, from geometrical or extruded shape spline to mesh or poly. I will use a Plane, also I will use materials without texture maps, to can catch the idea only.
This is all:
- Create Multi/Sub-Object material
- Create a Plane and adding Material modefier
- Animate Material ID
1. Create Multi/Sub-Object material
 In empty slot in Material Editor press on Standard end select Multi/Sub-Object material. Set Number to 2 and change Diffuse and Ambient color for both sub-materials. For first to pure white (RGB: 255 255 255), and pure black (0 0 0) to second one. Also change Self-Illumination to 100 for 1st and check Color box for 2nd. The material is ready.
2. Create a Plane and adding Material modefier
- Create a Plane
- Assign material to the plane
- Add Material modefier to it
As you can see, the Material modefier has only one parameters - Material ID, but animateable and it's enough for our task. Now we can setup your keys using ID 1 for on and ID 2 for off event. We can do it manually or to expedite the task using a script. But if you plan to use some script, first you must rename Material modefier, because it default name "Material" will create conflict in MAXScript.
So I renamed it to "MaterialMod" and here's some example:
 Well, that's all.
Demo video (example):
PDF version here (54 kb)
Wednesday, April 1, 2009
3ds Max become freeware

Another useful site
Site offers free 3d models and textures, also tutorials (Russian).


