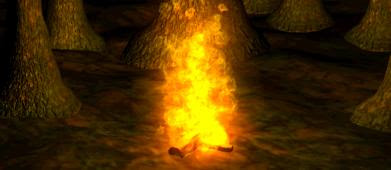
This tutorial will walk you thru creating realistic fire using 3ds Max’s particle system. With the right particle generation, texture, and material, you can produce some fairly realistic effects.
Part 1 - Creating a Fire Material
First part explains how to create a fire texture to be applied to particles in order to create a realistic fire effect.
Start by creating a new Standard material. Under Shader Basic Parameters, choose Blinn. Choose an orange color for Ambient/Diffuse Color. I chose an RBG of
Red: 255
Green: 120
Blue: 0
Hue: 20
Sat: 255
Value: 255
Check the self illumination box and select a slighter brighter orange color. I chose
Red: 255
Green: 174
Blue: 0
Hue: 29
Sat: 255
Value: 255
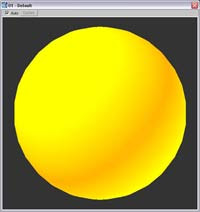
So far your material should look like this.

Under maps, choose diffuse color. Pick Particle Age and hit ok.
For Color #1 choose a red color, and for Age #1 type in 20%.
For Color #2 choose an orange color and Age# 2 type in 50%
Color # pick white and Age# 3 make 100%
Go back up to the parent level by clicking on the go to parent button. Make sure the diffuse amount for the diffuse map is 100. Click on the self illumination map and choose Smoke. Under Smoke Parameters choose size: 40 and make color 1 an orange color and color 2 a yellow color.
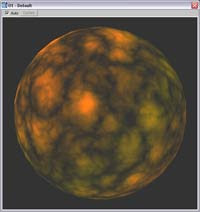
 Go back to the parent level. Under the opacity map choose Smoke. Under Smoke Parameters choose size: 40 and make the two colors pure white and pure black. Your material should look like this.
Once you have a material that looks like this you are ready to move on to particle creation and how to apply the material to the particles. If you have a strong understanding of particles, then you should be able to have a lot of fun with this material.
Part 2 - Work with Particles
Step 1 Setting up Particles
Start by creating a blizzard particle system and place it in your scene so its pointing upwards. To do this go to Create > Particles > Blizzard. Rotate the particle emitter 180 degrees so its pointing up. Under the modify panel, change the emitter size to 45 x 45.
The viewport display show how the particles will be represented in the viewport, not how the particles will be rendered. The percentage of particles displays a certain percentage in the viewport but the amount of particles rendered will always be 100%.
Step 2 Particle Generation
Under Particle Generation choose a user rate of 3. This controls how many particles are to be created per frame. Under Particle Motion choose a speed of 1.97, a variation of .276, tumble 0 and tumble rate 0. Under Particle Timing make your Emit start a negative number. You can make that negative number the amount of frames you have so that the particle generation is constant throughout the clip. My frame count is 250 so I chose an Emit Start of -250, Emit Stop and Display Until of 250. Chose 36 for Life and 34 for Variation. Under Particle Size choose 2.24, Variation 2.39, Grow For 5 and Fade For 29.
Speed of the particles determines how fast the particles are moving. Variation allows for various particles to travel at different speeds. Emit start determines when you wish to start generating particle, Emit Stop determines when you wish to stop generating particles and Display until determines which frame you wish to no longer display particles. Life determines how many frames the particle will live for. One particle will last for 36 frames in this case.
Step 3 Instanced Geometry
Under Particle Type choose Instanced Geometry. This allows the particle to be any mesh or geometry created in the scene. We are going to create a custom particle. Create in your scene a Sphere of a radius of 3.625 and 32 Segments. Now add a noise modifier to the sphere. Under the noise Parameters, choose Seed 0, Scale 4.777, Roughness 0, Iterations 4.48. Under Strength make X: -2.87, Y: 5.59, Z: 12.182. We now have a custom particle that looks pretty crazy. Go back to the particle emitter parameters. Under particle type, you should have Instanced Geometry selected. Scroll down until you see a button that says Pick Object. Click on that button and choose the sphere you just created. Right click on the sphere and choose hide selected. You no longer need to mess with the sphere. Now the particle emitter should emitting many little spheres. To see this change your viewport display from dots to mesh. (be careful as this could crash your computer) Once you have had your fill, switch back to dots to save memory.
Step 4 Adding Materials
Hit M and add your material to the particle emitter by either dragging it to your emitter or hitting the assign to selection button. This will add the fire material you created to your particle system. Do a test render, you should have something that looks pretty close to fire. Under the Material ID Channel, change the ID from 0 to 1.
Step 5 Video Post
To add the final touch were going to use 3ds Max’s Video Post. Under Render choose Video Post. Click on the add scene event button. Choose Camera. If you don’t have a camera then just choose perspective. Make sure that the VP start time and VP end time match the length of your main timeline. In this case the VP start time is 0 and the VP end time is 250. Hit ok. Make sure you don’t have anything in your queue highlighted. Next click on the add image filter event button. Choose lens effect glow and hit ok. Again, make sure you have nothing in the queue highlighted. Last choose the image output event button. Click on file and choose a path to save your file. Also choose an output type. I usually use .mov for QuickTime movies.
Double click on Lens Effects Glow and click on Setup. Click the VP Preview button. This gives a general idea of what the glow will look like. Click the VP Queue button to see a preview of your scene. Under Properties check the effects ID checkbox. Make sure you have effects ID 1. Under the preferences tab change the Effect size to 7. Make sure the Color type is pixel and bring the intensity down to 1. You can play around with these preferences to get various desired effects. Under the inferno tab you can also tweak some of the Gaseous, Fiery or Electric settings for other various desired effects.When you are ready to render out your movie, click the Execute Sequence button under the video post options. Choose your output size and time range and hit render. You may have to play around with the settings, but the general idea is to mimic movement, opacity and the brightness of fire using a combination of custom particle and post effects.


No comments:
Post a Comment
Thanks for your comment